

How to install Anaconda and get Jupyter Notebook through Anaconda
Anaconda is an open source and free software which distributes many environments for the development of Python and R applications. It is specifically used for scientific computing, that aims to simplify package management and deployment. The distribution includes data-science packages suitable for Windows, Linux, and mac operating system.
Jupyter Notebook is an open source web environment where we develop and execute Python, Machine Learning, Deep Learning, Data Science applications.
Follow the following steps:
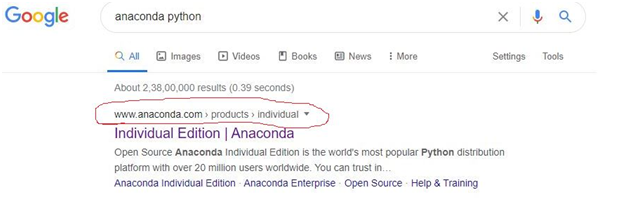
Step-1:
In Google, type anaconda python and go to anaconda official site.
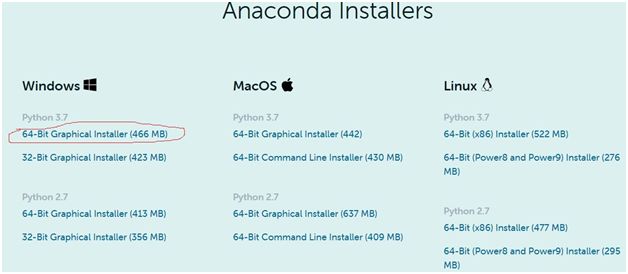
Step-2:
Download the latest Anaconda graphical installer for Windows from and check for the Windows architecture on your computer. If its 64-bit then choose the 64 bit graphical installer or else choose the 32-bit installer. Choose Python 3.7 for working with Python 3. This is the preferred option as python 2.7 is reaching its End-Of-Life by 2020.
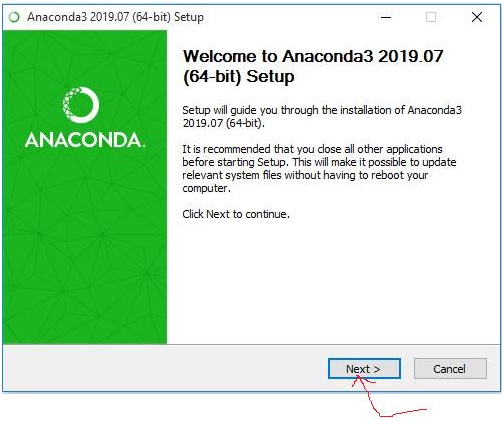
Step-3:
After downloading install anaconda.
.png)
.png)
.png)
.png)
Then installation will start. It takes few minutes for installation to complete.
Step-4:
After anaconda installation open anaconda navigator page then you can get Jupyter Notebook.
.png)
.png)
Step-5:
Now click on launch button, then Jupyter Notebook will install and open in a browser automatically.
About the Author

Silan Software is one of the India's leading provider of offline & online training for Java, Python, AI (Machine Learning, Deep Learning), Data Science, Software Development & many more emerging Technologies.
We provide Academic Training || Industrial Training || Corporate Training || Internship || Java || Python || AI using Python || Data Science etc


PreviousNext
Join our newsletter for the latest updates.
About us
Our Services
Contact Us
Our Courses
Learn Python | Learn AI | Learn Machine Learning | Learn Deep Learning | Learn Core Java | Learn Java JSP | Learn Java Servlet | Learn Java Spring Core | Learn Spring Boot | Learn Power BI | Learn DAA | Learn HTML | Learn SQL | Learn C Programming | Learn Bootstrap | Learn Git | Learn JavaScript | Learn Data Structure Using C | Learn RDBMS | Learn Data Science | Learn PHP
Our Tutorials
Python Tutorial | AI Tutorial | Machine Learning Tutorial | Deep Learning Tutorial | Core Java Tutorial | Java JSP Tutorial | Java Servlet Tutorial | Java Spring Tutorial | Spring Boot Tutorial | Power BI Tutorial | DAA Tutorial | HTML Tutorial | SQL Tutorial | C Programming Tutorial | Bootstrap Tutorial | Git Tutorial | JavaScript Tutorial | Data Structure Using C Tutorial | RDBMS Tutorial | Data Science Tutorial | PHP Tutorial
Copyright © 2023 Pythontpoint Powered by Silan Software Pvt. Ltd. All rights reserved.